If you’re experiencing issues with your oven’s heating or temperature control, a faulty thermostat could be the culprit. Fortunately, replacing this essential part of your oven is a fairly straightforward process that you can easily do yourself with our step-by-step guide.
In this comprehensive guide, we’ll walk you through the process of replacing a faulty oven thermostat, including understanding how the thermostat works, gathering the necessary tools and materials, taking important safety precautions, and testing the new thermostat to ensure it’s functioning correctly.
Don’t let a faulty oven thermostat keep you from enjoying delicious home-cooked meals. Follow our guide to get your oven back in working order in no time.
Key Takeaways
- Replacing a faulty oven thermostat is a straightforward process that you can do yourself with the right tools and instructions.
- Understanding how the thermostat works and taking important safety precautions are essential steps in the replacement process.
- Testing the new thermostat and troubleshooting any lingering issues can help ensure your oven is functioning properly.
Understanding the Oven Thermostat
Before learning how to replace a faulty oven thermostat, it’s essential to understand how it works. An oven thermostat is responsible for regulating the temperature inside your oven and maintaining it at the set level. Without this crucial component, your oven could overheat or not heat up at all, leading to ruined meals and frustrating cooking experiences.
There are two main types of thermostats: mechanical and electronic. Mechanical thermostats use a metal probe to sense the temperature, while electronic thermostats rely on sensors and digital programming to control the oven’s temperature. The type of thermostat in your oven will determine the replacement process, so make sure to check your oven’s manual or do some research to identify the type.
An oven thermostat consists of several components, including a control knob, a capillary tube, and a temperature-sensing bulb. The control knob allows you to set the desired temperature, while the capillary tube transfers the temperature to the sensing bulb, located inside the oven. The sensing bulb expands or contracts depending on the temperature, sending signals to the thermostat to turn the heating element on or off to maintain the set temperature.
Types of Oven Thermostats
As mentioned, there are two types of oven thermostats: mechanical and electronic. However, within these two categories, there are also variations in design and functionality. Here are a few examples:
| Mechanical Thermostats | Electronic Thermostats |
|---|---|
| Bi-metal thermostats | Touchpad thermostats |
| Gas oven thermostats | Smart thermostats |
| Electric oven thermostats | Programmable thermostats |
Depending on your oven’s make and model, you may have a different type of thermostat. Understanding the type and design of your oven thermostat is crucial to ensure a successful replacement process.
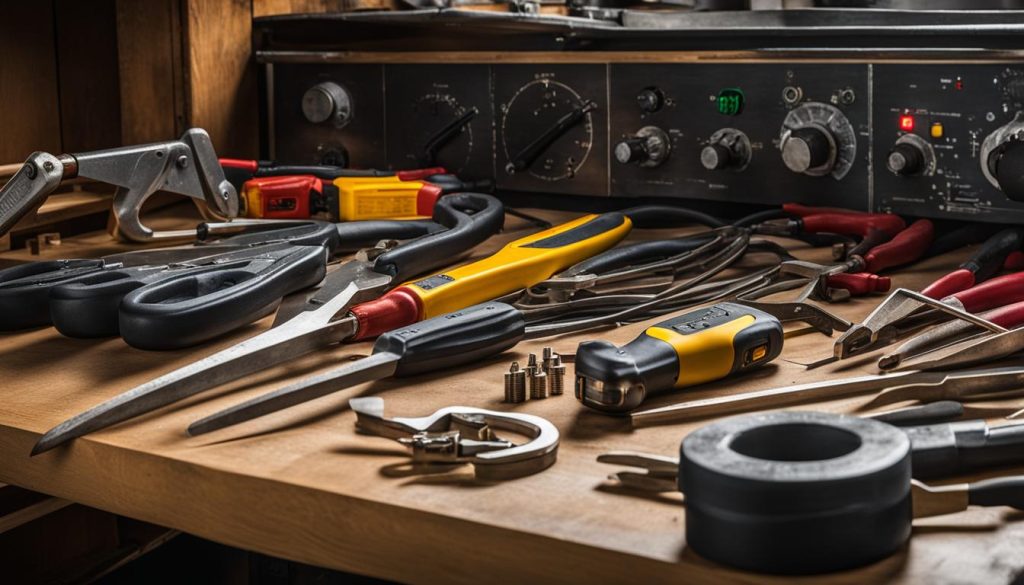
Gathering the necessary tools and materials
Before you begin replacing a faulty oven thermostat, make sure you have all the necessary tools and materials. Not having the right equipment can make the process difficult and time-consuming. Here is a list of tools and materials you will need:
- Screwdrivers: You will need a Phillips-head and flat-head screwdriver to detach and attach screws.
- Needle-nose pliers: You will need these pliers to disconnect the electrical connections from the old thermostat.
- Wire cutters: You may need wire cutters to remove any wires that are obstructing the old thermostat.
- New thermostat: You will need a new oven thermostat that is compatible with your oven model. You can find this part at appliance stores or online retailers.
- Wire connectors: You will need wire connectors to connect any electrical connections to the new thermostat.
Make sure to have all the tools and materials nearby before starting the replacement process. This will save you time, and hassle, and ensure a smooth replacement process.
Safety Precautions for Oven Thermostat Replacement
Replacing a faulty oven thermostat may seem like a simple task, but it’s important to prioritize safety to avoid potential risks during the process. Here are some safety tips and precautions to keep in mind:
- Disconnect the power: Before starting any work on your oven, make sure to disconnect the power source. This can be done by unplugging the oven or turning off the circuit breaker that powers it to avoid electric shock.
- Wear protective gear: Always wear heat-resistant gloves and safety glasses to protect your hands and eyes from high temperatures and potential debris.
- Let the oven cool down: Before starting the replacement process, ensure the oven has cooled down to avoid burning yourself when handling the components.
- Familiarize yourself with the oven: Take time to understand your oven’s make and model, its wiring and electrical connections, and the location of the thermostat, to prevent any damage during the replacement.
- Use the right tools: Make sure to use the appropriate tools and materials as outlined in Section 3: Gathering the necessary tools and materials to ensure a safe and efficient replacement process.
- Follow the instructions: Carefully follow the step-by-step instructions detailed in Section 5: Removing the old oven thermostat and Section 6: Installing the new oven thermostat to avoid any mistakes or accidents.
- Test the thermostat: After installation, test the new thermostat to ensure it is working correctly.
By following these safety tips and precautions, you can successfully replace a faulty oven thermostat without any accidents or damage to yourself or your appliance. Keep safety a top priority to ensure an efficient and secure replacement process.
Removing the old oven thermostat
Before removing the old thermostat, ensure that the oven is not plugged in, and the power is off.
The location of the thermostat may vary depending on the oven model, but it is usually located near the oven’s burner or behind the control panel.
Start by removing the screws or clips and securing the thermostat in place. If the thermostat is connected to wires, gently pull the wires to detach it from the oven. Take note of which wire is connected to which terminal so that you can connect them correctly during installation.
Note: If the wires are connected with slip-on connectors, use pliers to gently pull the connectors off the terminals. Do not pull on the wires themselves.
Expert Tip: Take a picture of the thermostat’s wiring before removing the old thermostat. This will serve as a helpful reference when connecting the new thermostat.
After removing the old thermostat, check for any damage or signs of wear. If the thermostat is damaged or worn, it needs to be replaced.
Now that the old thermostat is removed, it’s time to move on to installation. Read on to discover the installation process and how to test your new oven thermostat.
Installing the new oven thermostat
With the old thermostat now removed, it’s time to install the replacement oven thermostat to restore your oven’s proper heating function. The process may vary slightly depending on the type of oven you have, so consult your owner’s manual for specific instructions.
Before starting the installation, ensure you have the necessary tools and materials handy, including:
- Screwdriver
- Pliers
- Wire cutters/strippers
- New oven thermostat
Now, follow these steps to secure your new oven thermostat:
- Take a photo or make a note of the connections and wiring of the old thermostat before disconnecting them; this will help you connect the new one correctly.
- Connect the wires to the corresponding terminals of the new thermostat, mimicking the same connections as the old one. Use pliers to secure the wires to the new thermostat to avoid them coming loose during use.
- Secure the new thermostat to the mounting bracket or clips, ensuring that it is snug and not loose. Use screws to tighten the thermostat in place, but don’t over-tighten the screws as it may damage the thermostat.
- Double-check to see the thermostat is securely installed and the wires are connected properly. Verify that your new oven thermostat is compatible with your oven model.
Once you have completed the installation, turn on the oven to test its function. A new oven thermostat should result in a consistent temperature, so make sure to verify that the oven is heating properly before proceeding to use it.
Note: If you have any doubts about connecting the new oven thermostat, it’s best to call in a professional technician or an electrician to avoid any potential electrical risks.
Testing the new oven thermostat
Once the new oven thermostat is installed, it is essential to test it to verify if it is working correctly. Testing the thermostat involves verifying the temperature of the oven to determine if it is consistent with the temperature set on the control panel. This process ensures that the oven will cook and bake food correctly.
To test the replaced oven thermostat, follow these steps:
- Preheat the oven to a specific temperature, such as 350 degrees Fahrenheit.
- Use an oven thermometer to measure the temperature of the oven after it has preheated.
- Compare the temperature measured by the thermometer to the set temperature on the oven control panel. If the temperatures match, the oven thermostat is working correctly.
If the temperatures do not match, the thermostat might require calibration. Calibration involves adjusting the thermostat to ensure that it accurately regulates the oven temperature. Refer to the manufacturer’s instructions or seek professional assistance to calibrate the thermostat.
Verifying and calibrating the oven thermostat will ensure that your oven cooks food at the correct temperature. Testing the new thermostat is a vital step that should not be skipped.
Troubleshooting Common Issues
Replacing a faulty oven thermostat should resolve most temperature-related issues. However, some common problems may still arise even after a successful replacement. Here are some troubleshooting tips for the most common issues:
Oven temperature problems
If your oven temperature is still not consistent or accurate after replacing the thermostat, you may need to calibrate the oven. Follow these steps:
- Preheat your oven to 350°F.
- Use an oven thermometer to measure the temperature of your oven.
- If the temperature is off by more than 25°F, you will need to adjust your oven’s calibration. Refer to your oven’s manual for specific instructions on how to do this.
- If the temperature is off by less than 25°F, you may be able to compensate for the difference by adjusting the temperature setting accordingly.
The oven thermostat not working
If your oven thermostat is still not working after replacing it, there may be an issue with the electrical connections. Check to make sure all connections are secure and properly installed. If the connections are fine, the issue may be with the oven’s control board, and it may need to be replaced.
Other issues
If your oven is still experiencing issues after replacing the thermostat, there may be other underlying issues that need to be addressed. These could include a faulty heating element, a malfunctioning control board, or a damaged oven door gasket. In these cases, it’s best to consult a professional for assistance.
Remember to always follow safety precautions and turn off power to your oven before attempting any repairs. If you are unsure about any part of the replacement or troubleshooting process, consult an oven professional for assistance.
Conclusion
Replacing a faulty oven thermostat can seem like a daunting task, but with our comprehensive guide, you now have the knowledge and tools necessary to take on this project with confidence. By understanding how the thermostat works and taking the necessary safety precautions, you can successfully remove the old thermostat and install a new one.
Troubleshooting Tips
Although replacing a faulty oven thermostat should resolve most temperature issues, some problems may persist. If you are still experiencing temperature inconsistencies, there may be other problems with your oven. Consider checking your oven’s seals and gaskets, which may be allowing heat to escape, or consult a professional if you are unsure.
Another common issue is with oven calibration. If you find that your oven is still not heating to the correct temperature, you may need to recalibrate the thermostat. Refer to your oven’s manual for instructions on how to calibrate the thermostat properly.
Overall, by following our step-by-step guide and taking the time to troubleshoot any lingering issues, you can enjoy a fully functioning oven with consistent and accurate temperature control.
Written by Max | An appliance repair technician with more than 15 years experience in appliance repair services in Toronto and the GTA.
Disclaimer: This post "How do I replace a faulty oven thermostat?" is for information purposes only. If you need specific help, please contact Max Appliance Repair at https://www.maxappliancerepair.ca/contact/.