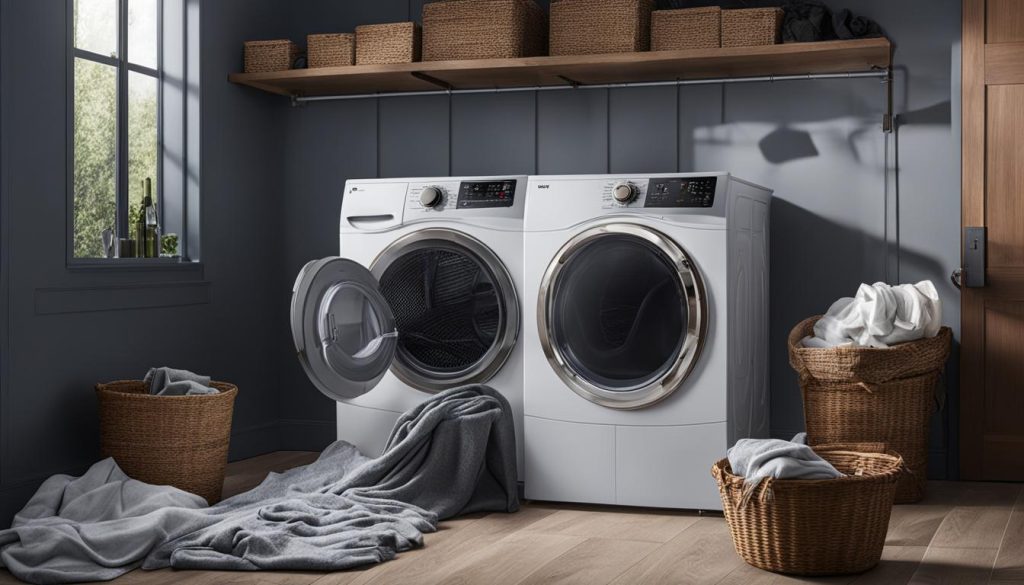
Have you noticed that your dryer is taking too long to dry clothes? If so, you are not alone. This can be a frustrating issue for many homeowners. Fortunately, there are several possible causes and solutions to improve drying efficiency.
Let’s explore some common reasons why your dryer may be taking longer than usual to dry clothes, and what you can do about it.
Key Takeaways:
- Clogged dryer vents can restrict airflow and cause longer drying times.
- Overloading the dryer can reduce airflow and hinder drying.
- Incorrect settings on the dryer can also prolong drying time.
- A malfunctioning heating element can result in inadequate heat production.
- Regular maintenance can help prevent issues that lead to extended drying times.
Clogged Dryer Vent
A clogged dryer vent is one of the most common reasons why your dryer may be taking too long to dry clothes. As the name suggests, the vent can become clogged with lint, dirt, and other debris over time, which restricts airflow and can cause the dryer to overheat or stop working altogether.
To determine if your dryer vent is clogged, there are a few things you can look out for:
- The dryer is running longer than usual, but the clothes are still damp
- The dryer feels hot to the touch
- There is excess lint around the dryer or on the ground near the vent
- You notice a burning smell coming from the dryer
If you notice any of these signs, it’s essential to clean the dryer vent as soon as possible. A clogged vent can not only affect the efficiency of your dryer but can also be a fire hazard.
How to Clean a Dryer Vent
Cleaning your dryer vent is a straightforward process that can be done with just a few simple tools:
| Tools | Materials |
|---|---|
| Flathead screwdriver | Dryer vent brush or vacuum attachment |
| Cordless drill | Dryer vent cleaning kit |
| Dryer vent clamp | Work gloves |
Before you begin, make sure the dryer is turned off and disconnected from the power source. Then, follow these steps:
- Locate the dryer vent on the outside of your home and remove the vent cover.
- Using the flathead screwdriver, loosen the vent clamp and gently pull the vent hose away from the dryer.
- Clean out any excess lint or debris from the hose and vent using the dryer vent brush or vacuum attachment.
- If the hose or vent is still clogged, use the dryer vent cleaning kit to remove any blockages.
- Reconnect the hose and vent, ensuring the vent clamp is tight.
- Replace the vent cover on the outside of your home.
With a clean dryer vent, your dryer should be running more efficiently, and your clothes should be drying faster. It’s recommended that you clean your dryer vent at least once a year to prevent clogs and keep your dryer running smoothly.
Overloaded Dryer: Tips for Properly Loading Your Dryer to Ensure Efficient Drying
Overloading a dryer with too many clothes can restrict airflow, reducing its efficiency and resulting in longer drying cycles. To avoid an overloaded dryer, follow these tips:
- Divide your laundry into smaller loads: When washing and drying clothes, separate them into smaller loads. This helps to ensure that the dryer can circulate enough air to dry the clothes efficiently.
- Fill the dryer drum no more than halfway: Overfilling the dryer drum makes it harder for the clothes to tumble freely and dry evenly. Fill the drum no more than halfway to allow enough room for clothes to move around.
- Remove bulky items: Large items such as comforters or blankets require more space to move around and dry effectively. Remove these bulky items and dry them separately to avoid overloading the dryer.
If you notice that your dryer is taking longer than usual to dry clothes, it may be overloaded. By following these tips, you can ensure that your dryer is loaded properly, allowing for efficient and effective drying cycles.
Incorrect Dryer Settings
Improper settings on the dryer can significantly prolong drying times, not to mention damage fabrics by applying too much heat. It is essential to select the correct settings to ensure efficient drying and prolong the lifespan of your clothes.
The Right Drying Cycle
Choosing the right drying cycle is important for achieving optimal drying results. For instance, if you have a small load, be sure to select the appropriate cycle. Similarly, always double-check the dryer settings before starting the cycle to ensure you have the right temperature and cycle length for the fabric type.
Tip: Use the “less dry” option if you plan to iron your clothes afterward. Your fabrics might still have a bit of moisture, and ironing will help remove any wrinkles and dry them further.
The Right Temperature
Another common mistake that can prolong drying time is setting the dryer temperature too high or too low for the fabric type. High heat can damage delicate fabrics, while low heat may prolong drying and leave clothes damp. Refer to the care label on the clothes to determine the appropriate temperature setting.
| Fabric Type | Dryer Temperature |
|---|---|
| Cotton and Linen | High |
| Delicate fabrics (Silk, wool, lace, etc.) | Low or air-dry |
| Synthetic fabrics (Polyester, nylon, etc.) | Medium or Low |
Time Settings
When setting the cycle length, remember to add a few extra minutes to the drying time for larger loads. This will help ensure all clothes are thoroughly dried.
It is also important to avoid underloading or overcrowding the dryer, as it can affect drying time and cause uneven drying.
Regularly checking and adjusting the dryer settings can improve drying time and prevent potential damage to your clothes.
Faulty Heating Element
A faulty heating element can cause your dryer to take longer to dry clothes, as it produces inadequate heat.
To identify a faulty heating element, first, make sure that the dryer is receiving power and that the thermal fuse, thermostat, and timer are all functioning correctly. If these components are working correctly, but the dryer still isn’t producing heat, then the heating element is likely to be blamed.
The heating element is located in the dryer drum and is visible when you remove the back panel of the dryer. It’s a long coil of wire that heats up when an electric current passes through it. If you see any breaks or damage to the coil, then it needs to be replaced.
| Steps to replace a faulty heating element: |
|---|
| 1. Unplug the dryer from the power source. |
| 2. Remove the back panel of the dryer. |
| 3. Locate the heating element and disconnect its wires. |
| 4. Remove the mounting screw(s) and carefully pull out the heating element. |
| 5. Install the new heating element and reassemble the dryer. |
Regular dryer maintenance, such as cleaning the lint filter and checking the vent hose, can help prevent issues with the heating element.
Dirty Dryer Lint Filter
A dirty dryer lint filter can cause your dryer to take much longer to dry clothes. When the lint filter becomes clogged, it restricts airflow and stops the dryer from functioning effectively. In this section, we will explore how to clean and maintain your dryer lint filter to improve drying efficiency.
First, locate the lint filter in your dryer. It is typically located inside the door or on the dryer’s top surface. Remove the filter from its slot and clear any visible lint from the screen. For a deeper clean, run the filter under hot water and scrub it gently with a soft-bristled brush. Allow the filter to air dry thoroughly before returning it to its slot.
It’s important to clean the lint filter after every use, as a clogged filter not only reduces airflow but also poses a fire hazard. Additionally, inspect the filter regularly for any signs of damage or wear and replace it immediately if necessary.
Pro tip: To ensure your dryer’s lint filter is functioning correctly, try the following trick. Pour a small amount of water onto the filter. If the water passes through the filter, it is clean and ready to use. If the water pools on the filter, it’s time for a deep clean.
Blocked Dryer Vent Hose
A blocked dryer vent hose can cause significant problems with a dryer’s performance. When the vent hose is blocked, the dryer cannot ventilate and will take longer to dry clothes. This is because the moisture stays trapped inside the dryer, reducing the airflow, and increasing the drying time. Additionally, the built-up heat and moisture can create a fire hazard, making it crucial to ensure a clear and unobstructed vent hose.
The first step in checking for a blocked vent hose is to disconnect it from the dryer and check for any debris or lint build-up. You can use a vacuum cleaner or a long brush to remove any obstruction from the hose. It’s also essential to check the outside vent to ensure it’s not blocked by any debris. If you do find any signs of blockage, it’s best to have a professional dryer inspect and clean the vent to ensure it’s safe and secure for use.
It’s recommended to clean the dryer vent hose every six months to avoid any blockages and ensure optimal performance. Additionally, using a vent hood cover can prevent debris from entering the vent hose and causing clogs.
Why is a blocked dryer vent hose dangerous?
A clogged dryer vent hose can create a hazardous environment for your home. The built-up heat and moisture can increase the risk of fire, and the dryer’s inefficient performance can cause excessive wear and tear on the appliance. To ensure the safety of your home and family, it’s essential to check for any blockages and install a vent hood cover to prevent future clogs.
“A clogged dryer vent can restrict airflow, causing the dryer to take longer to dry clothes.”
Improper Dryer Location
Where you place your dryer can have a significant impact on its performance. Proper ventilation and air circulation are critical for efficient drying, and a cramped or poorly ventilated space can lead to extended drying cycles.
If possible, locate your dryer in a spacious, well-ventilated area. Avoid placing it in a closet or small room with limited airflow, which can cause heat to build up, leading to longer drying times. If you must put your dryer in a tight space, consider installing a ventilation fan to enhance air circulation.
Additionally, be sure to leave enough space around the dryer for proper ventilation. The dryer should have at least 4 inches of space behind it and one inch on each side to allow for adequate airflow. If your dryer is stacked on top of another appliance, be sure to leave enough clearance for proper ventilation as well.
Remember, proper location and ventilation are crucial to ensure efficient drying with your dryer. Take the time to consider the location carefully, and make any necessary adjustments to enhance airflow and performance.
Damp Clothes Before Drying
Starting the drying process with damp clothes can significantly increase drying time. Before placing clothes in the dryer, it’s important to make sure they are adequately wrung or spun to remove excess moisture. This will allow the dryer to focus on evaporating the remaining water, reducing overall drying time.
If you have a high-capacity dryer, it can be tempting to overload it with damp clothes to save time. However, this can have the opposite effect and prolong drying cycles. It’s essential to properly load your dryer with just the right amount of clothes to ensure efficient drying, as explained in the previous section.
If you find that your clothes are still damp after a cycle, avoid simply restarting the dryer with the same load. This can cause the dryer to overwork and potentially damage the machine. Instead, remove any excess moisture and run a shorter cycle to finish drying.
Clothes Wringer
If you often find that your clothes are excessively damp, consider investing in a clothes wringer. A clothes wringer is a device that can be attached to a washing machine or used manually to remove moisture from clothes before drying. By removing excess water before the drying cycle, clothes will dry quicker and more efficiently.
“When clothes are damp before drying, it can cause the dryer to overwork and potentially damage the machine”
Aging Dryer
If you’ve noticed that your dryer is taking longer to dry clothes, it could be due to the age of your appliance. Over time, wear and tear can lead to reduced efficiency in drying clothes. Additionally, older models may not have the same technology as newer models, making them less efficient at drying clothes.
While it may be tempting to continue using an aging dryer, it’s important to consider if it’s worth the extra time and energy costs. In some cases, purchasing a new, more efficient dryer can save you money in the long run due to reduced energy costs.
If you’re not ready to replace your aging dryer just yet, there are still steps you can take to improve its efficiency. Regular maintenance, such as cleaning the lint filter and inspecting the vent hose for any obstructions, can help ensure that your dryer is operating at its best.
Simple Maintenance Checklist for Aging Dryers
Here are some simple maintenance tasks you can perform on your aging dryer to help keep it running smoothly:
- Clean the lint filter before each use
- Inspect the vent hose and remove any obstructions
- Check the drum for any signs of wear and tear
- Inspect belts and pulleys for any signs of damage
- Lubricate moving parts to reduce friction
Performing these tasks regularly can help prolong the life of your aging dryer and improve its efficiency. However, if you find that your dryer still takes too long to dry clothes even after performing these maintenance tasks, it may be time to consider purchasing a newer, more efficient model.

Routine Dryer Maintenance
Regular maintenance is crucial to ensure the efficient operation of a dryer. Neglecting routine maintenance can lead to a buildup of lint, reduced airflow, and eventually, longer drying cycles. In this section, we’ll outline some essential tasks for maintaining your dryer and improving its performance.
Clean the Lint Filter
Cleaning the lint filter after every use is one of the easiest and most important maintenance tasks you can do. A clogged filter can restrict airflow, causing the dryer to take longer to dry clothes. To clean the filter:
- Remove the lint filter from the dryer
- Remove any visible lint from the filter
- Rinse the filter with water
- Dry the filter thoroughly before placing it back in the dryer
It’s also important to periodically check the lint filter for any damage. If the filter is torn or damaged, it should be replaced immediately.
Inspect the Vent Hose
The vent hose carries hot, moist air out of the dryer to the outside. Over time, the vent hose can become clogged or damaged, which can reduce airflow and cause longer drying times. To inspect the vent hose:
- Disconnect the vent hose from the back of the dryer
- Inspect the hose for any damage or obstructions
- Clean the hose with a vacuum or brush to remove any lint or debris
- Reconnect the hose and ensure it’s properly secured
If the vent hose is damaged, it should be replaced as soon as possible to prevent any safety hazards.
Clean the Dryer Drum
Over time, lint and other debris can accumulate inside the dryer drum. This buildup can reduce airflow and cause longer drying times. It can also be a fire hazard. To clean the dryer drum:
- Unplug the dryer
- Remove any clothes or debris from the drum
- Clean the interior of the drum with a cloth and mild detergent
- Rinse the drum with water and let it dry completely before using the dryer again
Check Belts and Pulleys
The belts and pulleys in the dryer are essential components that help drive the drum and operate the dryer’s fan. Over time, these parts can become worn or damaged, which can affect the dryer’s performance. To check the belts and pulleys:
- Unplug the dryer
- Remove the front panel of the dryer
- Inspect the belts and pulleys for any wear or damage
- If any parts are worn or damaged, they should be replaced immediately
By performing these routine maintenance tasks, you can improve the efficiency of your dryer and ensure it operates safely. Remember to always unplug the dryer before performing any maintenance, and if you’re unsure about how to perform any task, consult the owner’s manual or a professional technician.
Conclusion
Properly maintaining a dryer can not only improve drying efficiency but also prevent safety hazards. Ignoring common issues such as clogged vent hoses or dirty lint filters can increase the risk of dryer fires. Therefore, it is essential to address any problem as soon as it arises.
Regular maintenance tasks such as cleaning the dryer drum, inspecting belts and pulleys, and lubricating moving parts should be performed to keep the dryer in good condition. Additionally, correctly loading the dryer with appropriate settings and ensuring clothes are properly wrung or spun before drying can greatly reduce drying time.
While an aging dryer can lead to longer drying cycles, replacing it with an energy-efficient model can not only improve performance but also save money on energy bills. Remember, investing time and effort in maintaining a dryer can significantly improve its performance and lifespan to get the most out of your appliance.
Written by Max | An appliance repair technician with more than 15 years experience in appliance repair services in Toronto and the GTA.
Disclaimer: This post "Why is my dryer taking too long to dry clothes?" is for information purposes only. If you need specific help, please contact Max Appliance Repair at https://www.maxappliancerepair.ca/contact/.