
Same-Day fridge Repair
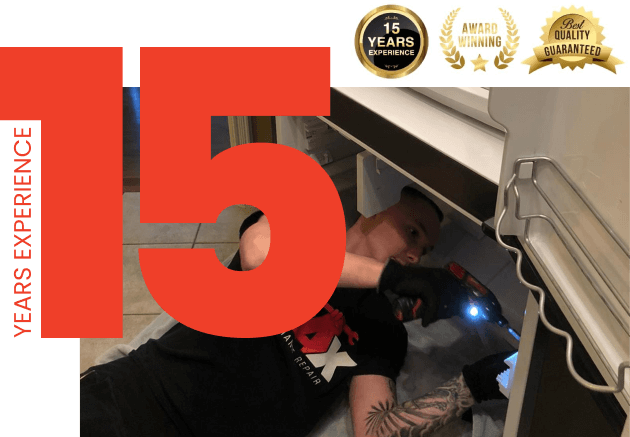
15 Years Experience. Award Winning. over 1500 reviews.
Did your fridge break down? We can fix it today! Max Appliance Repair offers same-day fridge repair services throughout the GTA, 7 days a week. Our experts can handle all refrigerator brands and models, ensuring your groceries and peace of mind are preserved.
- Trusted & Reliable Service
- Certified Technicians
- Same-day Repairs
- Service All Fridge Brands


Licensed & Experienced
Warranty on Parts & Labour
100% Customer Satisfaction
Award Winning Support
24/7 Emergency Services
Testimonials From our Clients
common fridge problems we fix everyday
With years of experience and expertise in handling various fridge models and brands, we stand as the top choice for fridge repair services in Toronto. Our track record includes successfully resolving a wide range of both simple and complex fridge issues, demonstrating our capability to tackle any problem your fridge may encounter. Additionally, we offer professional fridge installation services, ensuring that your new appliance is set up correctly and ready to use. Here are some of the most frequently encountered problems we’ve adeptly addressed:
- Fridge is not cooling
- Fridge not defrosting
- Fridge is vibrating or shaking
- Fridge is too cold or freezing food
- Ice maker not working or producing ice
- Fridge has a bad odor
- Frost buildup in the freezer
- Fridge is leaking water
- Fridge is too warm
- Fridge light not working
- Fridge not dispensing water
- Fridge temperature fluctuations
- Fridge making strange noises
- Fridge power issues
- Fridge making strange noises
- Fridge is leaking inside
- Fridge is too cold
- Fridge thermostat problems
- Fridge interior moisture buildup
- Fridge door not sealing properly
- Fridge constantly running or cycling
- Fridge display or control panel malfunction
- Fridge compressor issues
Types of REFrigeRATORs we repair
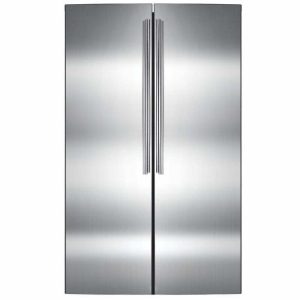
Side-by-Side Refrigerator Repair
Is your Side-by-Side refrigerator giving you trouble? Max Appliance Repair specializes in fixing common issues with these fridges. Whether it’s uneven cooling, water dispenser problems, or strange noises, our certified technicians have you covered. Enjoy the convenience and extra storage of your Side-by-Side fridge with our quick and efficient fridge repair solutions across Toronto.
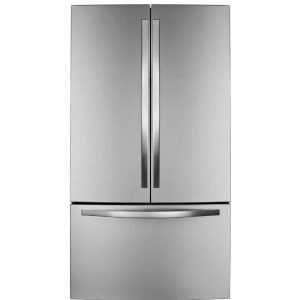
French Door Refrigerator Repair
French door refrigerators offer exceptional storage and style to modern kitchens. However, when these appliances encounter issues, it’s essential to have them repaired promptly. Max Appliance Repair specializes in providing same-day French door refrigerator repair services across the Greater Toronto Area. A fully functional fridge is essential and our certified technicians are will fix it right in one go!
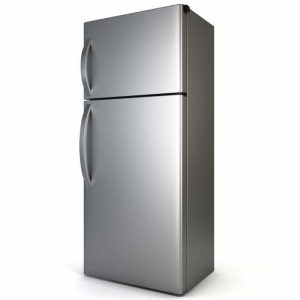
Top Freezer Refrigerator Repair
Top freezer refrigerators are a practical and cost-effective choice for homeowners. Our expert technicians specialize in speedy and efficient repair services for your top freezer refrigerator. Whether it’s cooling issues, unusual noises, or other concerns, we’re here to provide reliable top freezer refrigerator repair services in Toronto and the entire GTA.
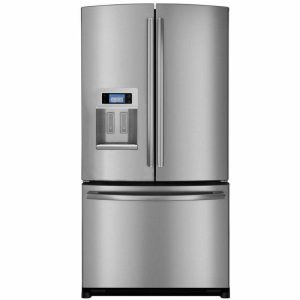
Bottom Freezer Refrigerator Repair
If your bottom freezer refrigerator is acting up, don’t stress. Our expert technicians provide fast and reliable repair services for bottom freezer fridges in Toronto and the GTA. Enjoy the convenience of easy access to your frozen items once more with our efficient appliance repair solutions. Contact us today for quick assistance!
Compact/Mini Refrigerator Repair
If you have a compact or mini refrigerator that needs repair, Max Appliance Repair is here to help. Whether it’s for a dorm room, home bar, or as an extra fridge for your upcoming gathering or party we will ensure they run efficiently when you need them the most. Our expert technicians specialize in compact fridge repairs and can quickly and affordably resolve any issues you may encounter.
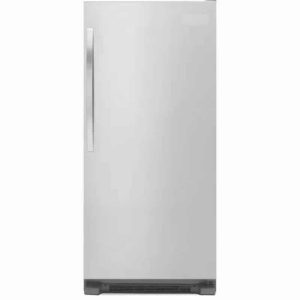
Freezerless Refrigerator Repair
Max Appliance Repair specializes in freezerless refrigerator repair, providing certified and experienced technicians to service all makes and models. Our experts can quickly diagnose and repair your freezerless refrigerator with precision, ensuring it runs smoothly and efficiently. Don’t hesitate to call us for fast and reliable fridge repair services!

Same-day Service is Available
Fix Your fridge Today!
Tired of searching for the right repair company? Look no further! Max Appliance Repair offers reliable and affordable solutions to ensure the job gets done right in first go!

Family Owned.
Google guaranteed Appliance Repair Company
With over 1500 Google reviews, we’ve become a trusted choice for expertly fixing broken appliances. Our commitment to excellence has earned us the coveted Google Guaranteed status, making us the top choice for fridge repairs in the Greater Toronto Area.
We understand the stress of a dysfunctional fridge, especially with a busy schedule. Our dedicated team is committed to providing top-notch fridge repair services with a focus on excellent customer care. We aim to make your experience as convenient and accessible as possible so that you can have a fully functioning fridge in no time!
frequently asked questions
Repairing your fridge can be a cost-effective solution compared to buying a new one. It’s worth getting it repaired if the repair cost is significantly less than the price of a new fridge, especially if your current fridge meets your needs in terms of size and features. Additionally, fixing your fridge helps reduce electronic waste and is more environmentally friendly.
The ease of fixing a fridge depends on the issue and your technical skills. Simple problems like a clogged drain or a faulty thermostat may be manageable for some homeowners. However, more complex issues, such as compressor or coolant problems, often require professional expertise. It’s essential to consider safety and the risk of causing further damage when attempting DIY fridge repairs.
Yes, fridge freezers can typically be repaired. Many issues that affect refrigerators can also affect freezer compartments. Professional technicians can diagnose and fix problems related to cooling, defrosting, or other freezer-related functions, restoring your fridge freezer’s optimal performance.
The cost of fridge repairs in Toronto varies depending on the problem and the type of fridge. On average, basic repairs like fixing a thermostat or replacing a fan motor can cost anywhere from $100 to $400 or more. However, more complex issues, such as compressor replacement, may cost between $300 and $800 or more. It’s advisable to request a quote from a local appliance repair service for an accurate estimate.
Common refrigerator problems include inadequate cooling, water leakage, strange noises, faulty thermostats, and defrosting issues. These issues can arise due to various factors, such as clogged vents, worn-out components, or thermostat malfunctions. Professional technicians can diagnose and address these problems effectively.
Yes, most of our repair services are under warranty for up to 3 months.
Max Appliance Repair is available for same day repair anywhere in the GTA. We also perform same day fridge repairs which means that you will have your fridge back up and running in no time.
Yes, all of our technicians are both licensed and certified.
Your refrigerator is one of the most important appliances in your home. If your fridge is off for just a few hours, it can have disastrous consequences. The best way to protect your fridge from unexpected breakdowns is to conduct regular maintenance. Sticking to the right cleaning and inspection schedule will make it that much easier to spot problems sooner. Here is your essential fridge maintenance checklist:
Door Seals
Check the seals on your fridge and freezer doors every 2 to 3 months. Before you can begin, you should take a couple of minutes to clean the seals properly and remove any dirt. Once clean, you can then check the seals for wear and tear or damage. If you want to make sure that they are working, simply close the door on a dollar bill. Once shut, try to remove the banknote without opening the door. If you are able to remove it, you might need to replace your door seals since they are not in top shape. This means that there is cold air loss and your fridge motor has to work extra hard.
Clean the Coils
The coils on the back of your fridge are responsible for eliminating heat. You will need to move your fridge to access the coils and you should unplug your fridge before cleaning them. Simply use a vacuum cleaner to remove all that dust. A soft, clean paintbrush can also help clean those difficult to reach areas.
Check the Water Filter
Bacteria and gunk can build up in your fridge water filter. This can disrupt the flow of water in the fridge and it poses an obvious health risk. As part of your regular fridge maintenance routine, make sure you replace the water filter as per the schedule set by the manufacturer.
Check the Level
 It’s a good idea to check that your fridge is level. Particularly if you move it to clean the coils. This can prevent the fridge from closing properly. That said, some people like to tilt their fridge slightly to the back in an effort to help the door shut perfectly.
Clean the Drainage Hole
A drainage hole in the fridge leads down to the drip pan. This is essential for removing condensation from the fridge. Make sure that you consult the user manual before removing mineral deposits from this drain hole. The drip pan should also be emptied and you should wipe it down to get rid of any debris.
Check the Temperature
While you want your fridge to be cool, there is no need for it to be ice cold. In fact, if you set your fridge too cold, it will only make the motor work harder. 37 – 40 degrees Fahrenheit is perfect when it comes to your fridge.
Fill your Fridge
Fridges need something called thermal mass. In other words, you need to keep items in your fridge in order to help keep it cool. Now, this does not mean that you should overload your fridge but it should not be empty either. There should be enough room in between everything for cool air to flow. Without proper air flow, your fridge will not be able to keep everything cool.
Prepare for Power Outages or Break Down
Make sure that you keep your local appliance repair service phone number on your fridge in the event of a problem. If the power goes out, make sure that you keep your fridge shut to keep the contents fresh until the power is restored.
Regular Interior Cleaning
As part of your regular maintenance routine, it’s important to make time to clean and deodorize your fridge regularly (approximately every couple of months). Remove any old or expired foods, wipe down all the surfaces, and make sure that everything is properly spaced apart so that cool air can flow freely throughout your fridge. You can also add a special deodorizer to your fridge to absorb those smells. A small, open box of baking soda is great for this very purpose.
During your regular fridge maintenance, it’s important to be on the lookout for any kind of damage. Hoses, seals, and other similar parts can become brittle over time and this can result in leaks. As soon as you notice any problems, call a professional appliance repair team to perform fast repairs. If your fridge stops working, check the power and the plug. If this is not the cause of the problem, you should contact a trained repair technician to diagnose and repair your fridge right away
Your refrigerator is one of the most crucial appliances in your home. It helps keep food fresh, cuts down on food waste, and provides clean, safe drinking water. As such, it is vital to take the necessary steps to ensure that your fridge is well-maintained and in good condition. But does regular maintenance make a difference in your refrigerator’s lifespan? Let’s find out.
The Benefits of Regular Refrigerator Maintenance
Regular maintenance can help improve the energy efficiency of your refrigerator and reduce its energy usage, resulting in cost savings on your monthly utility bills. On top of that, regular maintenance will also extend the life of your appliance and ensure that it continues to function at its best for years to come. In addition, proactive maintenance can help identify potential issues before they become major problems, thus avoiding costly repairs or replacements down the road.
The Signs That You Need Refrigerator Maintenance
If you notice that your refrigerator is not cooling efficiently or if any strange noises are coming from the appliance, then it may be time to call a professional for preventive maintenance. Other signs include condensation buildup inside the unit or frost accumulating on the back wall or shelves. Additionally, if you notice any leaks around the base of your refrigerator or if it continues to run despite making adjustments to its settings, then it’s time to call a technician for an inspection.
What Does Refrigerator Maintenance Entail?
Maintenance of a refrigerator typically includes checking seals and gaskets around the door for wear and tear, cleaning coils, inspecting hoses, testing temperature sensors, checking drain lines, inspecting evaporators and fans, replacing water filters, replacing air filters, checking compressor motors, cleaning condensers, and lubricating fan motors. Additionally, all electrical components will be inspected for corrosion and other damage during the inspection. This type of maintenance should only be performed by a licensed technician who has experience with refrigerators and other appliances.
Regular maintenance is essential for ensuring that your refrigerator lasts as long as possible and remains in good condition throughout its lifetime. Performing routine maintenance not only keeps costs down by reducing energy consumption but also helps identify potential issues before they become major problems so you can avoid costly repairs or replacements in the future